aspire_helen
-
Posts
116 -
Joined
-
Last visited
aspire_helen's Achievements
")
Newbie (1/14)
0
Reputation
-
Update. Fixed. Although the ABS fault warning came on after engine start, it did not appear during driving nor after restart.
-
C5 2.2Hdi 2001 Rear Suspension Cylinder Leak
aspire_helen replied to aspire_helen's topic in Problems and Fixes - C5
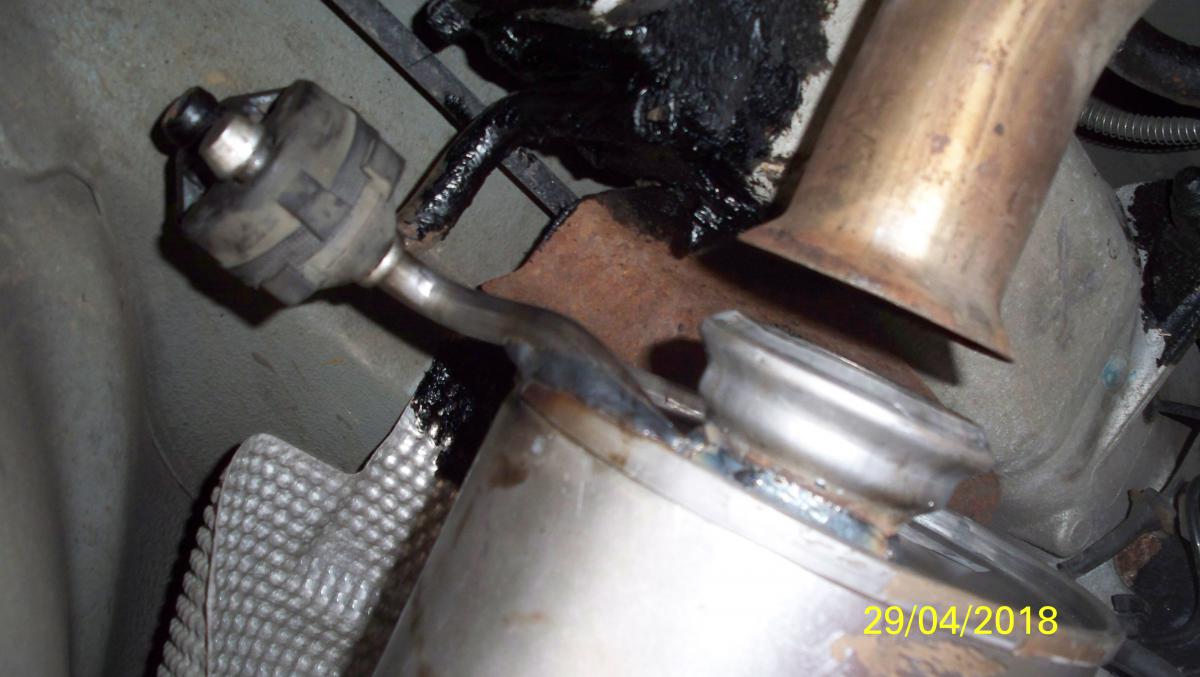
Just an update. Whilst replacing the suspension arm I investigated the oil leak at the rear end of boot (wide end). The oil is not seeping from the boot, nor from under the boot clamp (double-wire screw type). I levered off one side of the wire clamp which resulted in a rush of air and gurgling ie as air was sucked in through the fluid inside. Clearly the boot seal was air tight so could not be the source of the leak. It is now apparent the leak is from the vicinity of the "thrust bush" which is adjacent to the rear end of the boot. Hence, it may be that the seals are worn (cylinder o-ring, sliding seal and weatherstrip on the parts diag). -
Me again. Just found a thread in the Frenchcarforum which does indeed state that the ABS warning will persist until the car is driven (above 20km/hr) and successfully completes a dynamic self-test, or when cleared by a Lexia. I will go and try it!!!
-
Hi Having just replaced the rear suspension arms, I now have an "ABS System Faulty" warning which will not go away. I've tried numerous combinations of sensors and hubs (both original and new) , and rebooted the BSI several times, but the warning persists. I have 2 questions (more to follow!!!): 1. Is it possible that the fault is fixed but the warning needs to be removed by a code reader? And, if it does just need removing, what is the cheapest option to do so? In 15 years and 170,000 miles I have never had to connect a code reader or Lexia etc. 2. Do the ABS sensors actually need to be in place (ie adjacent to the magnetic ring in the hub) for the car to recognise them as serviceable or do they just need to be connected (ie under the rear seat above the fuel pump)? Background. Knowing that the fragile, plastic ABS sensors were likely to get damaged during removal from the suspension arms, I bought 2 new after-market ones just in case. RIGHT SIDE. I damaged the right sensor so cut its cable. I replaced the arm with a second hand one and fitted a new ABS sensor, but initially with the cable routed through the rear door. Initially, I got an ABS warning, but after extensive trial and error combinations of connectors and sensor it went away, so I believe the right side is good, with original hub and a new sensor. I finished the right side before beginning on the left. LEFT SIDE The left sensor came out OK and remained connected to the car. I had to fit an after-market hub (see other thread about rotating stub-axle). I refitted the original sensor and got the warning. I replaced it with the new sensor (again fed through the rear door) - still got the warning. I fitted in turn the original sensor and a new sensor into a loose original hub and still got the warning. So, every combination of an old or new sensor fitted to an old or new hub gives the warning!! How frustrating! Notes The new (left) hub appears Ok and certainly the sensor ring is magnetic. I have also made sure that in every case the air gap is correct, which prompts my 2nd question above. When both ABS sensors are disconnected, a 2nd additional warning appears -"ESP system faulty". Hence, it is possible to confirm whether the left or right sensors are at fault. Hence, I remain sure it is the left side which is causing the warning. Frustrated H!!
-
Paul The 19mm allen key worked a treat to stop the stub-axle rotating. I haven't fully torqued it down yet because I have an "ABS system faulty" warning, likely to do with the ABS sensors in the suspension arm. I will post a new topic on that. H
-
Iulian I might dispute your "very fine running" comment when the cambelt snapped at 70K miles in 2008 and destroyed the valve rockers!! :) All those 82K miles were after I rebuilt the cylinder head on my driveway (now done 170k miles). In fact, I started recording the fuel consumption to assess my work! Afterwards, I am sure the engine had less power but retained good mpg, so is fine for my relaxed driving style. During the re-fitting, one thing I could not do was measure the correct thickness of the cylinder head gasket (I think there are a choice of 4 thicknesses), so I just fitted a new one of the same thickness. I also allowed the cylinder bores to get a little rusty, requiring some fine emery work. Hence, the compression may have reduced. I agree with Paul - the mpg drops markedly above 65mph. And, as with Paul I have no experience of automatics, and I suspect your problem lies there. H
-
Thanks Paul, received. The procedure uses precisely engineered bushes as “tools†to calculate the thickness of shim required. Without those tools that procedure cannot be used. However, I believe the thickness can be determined by trial and error, by partially assembling the bearings into the arm with trial shims. The required M22x30mm shims are available on Ebay (0.1mm, 0.2mm, 0.3mm, 0.5 mm etc) for approx. £3 for 10 of each size. I measured the shim I removed from my arm as 0.018in (0.46mm), so 10 x 0.1mm should suffice. The original shim would be a good place to start. H
-
Hi What is your issue? Excessive fuel consumption or the error between the mpg figures. If the latter, then there is no point looking for causes of increased fuel consumption. The trip computer simply divides distance driven (from the odometer) and fuel used (from the fuel flow meter) over a fixed time period. So, there may be a slight error in either sensor. For comparison, I have recorded every drop of fuel I have put in my 2001 2.2HDi Hatch since 2008 and compared the calculated fuel top-up consumption with the trip computer each time. Sad, but true - and a very good comparator when the engine is not performing. In that time I have driven 82,252 miles using 7638.9 ltrs in 139 top-ups giving 49.1mpg. The average difference between trip mpg and fuel pump calculation is 3.1%, with the trip computer generally being the higher mpg, but not always. I regularly get 60mpg on longer trunk road cruising at 60mpg. I have more confidence in the fuel top-up consumption being the more accurate, provided that you always top up to the same point. I top up the tank on every fill until the auto-cut off has cut the flow 3 times. PS Ignore official consumption figures.
-
Hi I have searched various forums to find out how to properly shim the taper-roller-bearings (TRBs) when renewing the pivot bearings, but no luck. Two entries in this forum suggest simply re-using the shim which was previously fitted (assuming it can be recovered), but this assumes that the replacement bearings and spacers supplied with the online repair kits reproduce exactly the required original dimension. Bearing "repair" kits are readily available on-line, but none come with shims. Haynes suggest just buying the arm complete with bearings already fitted and adjusted....at £450!! I have heard that a dealer will choose to replace the arm, at the customer's expense, rather than the potentially more expensive labour cost of removing the old bearings, making good, fitting new bearings and measuring up for the shim. Moreover, if the dealer gets it wrong it could result in an expensive repair bill for them, so replacing the arm is their less risky option. In addition, the "complete" arm comes with extra costs ie a new hub and wheel bearing assembly; likely new ABS sensor; likely brake calliper problems etc. So, at the end of the day, being able to replace the bearings is the far cheaper DIY option.........subject to adjusting the TRBs correctly! If the shim is too thick, the TPRs will be overloaded and quickly break up; that is assuming the shim is not so thick as to prevent the pivot being fitted in between its aluminium subframe mounts in the first place. Being aluminium, there is also a risk of graunching the mounts with the pivot's hardened steel spacers during re-fitting. If the shim is too thin, or not fitted at all, the TPRs will be too slack, also resulting in shortened life. Can anyone provide the procedure? For a start, it would help to know the required specified width of the assembled pivot, ie between the outer faces of the opposing end spacers. Hope that makes sense. H
-
Thanks again Paul. I've ordered an extra long (10cm) 19mm allen shaft and socket with 1/2" drive for approx. £7 on Ebay. It has to be extra long - the flats inside the stubaxle are between 5 and 8 cm deep. I already had a set of such sockets but the 19mm was just too short to reach!! By the way, I am going to start another topic asking how to shim the suspension arm pivot TRBs (taper roller bearings). Helen
-
Many thanks again Paul. On that basis it would appear that all that is needed is to stop the axle rotating while tightening the hub nut. I notice that looking deep inside the hollow axle from the inside (ie from under the car) there are 12 pointed flats (like a socket) which take a 19mm hex-drive/allen key - just the ticket! But if it were that "simple" why does Service Box not mention this?! Currently, the axle is rotating at about 30Nm torque - ie very low. I will need to source a long 19mm hex drive, or perhaps a long bolt with 19mm AF will do. I would then hope that the axle will bed in and hold long before the full 250Nm!!! I'll let you know. Today I focused on finishing off replacing both rear suspension arms, and getting the car back on all 4 wheels - now successfully done - phew!. I don't need the car for a few days so I will attack the stubaxle problem separately. I am also getting intermittent "ABS faulty" warnings from one of the ABS sensors - nothing is ever easy on a C5! Ref Service Box. Are the maintenance procedures available to all for free (as with the parts catalogue), or are they one of the pay-for options? Helen
-
Hi Paul Thanks very much, I hoped you would reply. Didn't get much sleep last night with the heat and worry!! I will look at it again this morning and get back to you later. In the meantime can you quickly confirm just one thing. In which direction is the stubaxle knocked in? ie when facing the wheel do I drive it in from the hub side (outside), or the reverse from under the car (inside)? With the hub fitted it is not easy to tell, and Haynes does not specify. Helen
-
Hi Summary:On try to torque down the bearing nut, the whole stub axle rotates. This is on a genuine Citroen trailing suspension arm. Finally got around to replacing a rear trailing suspension arm . A while ago I bought on Ebay a genuine Citroen arm assembly (5175X8/9) going cheap, from a Citroen dealer presumably getting rid of old stock. It has the advantage of having the pivot bearings already fitted and adjusted. However, it has the draw back of coming without a hub bearing. It does come fitted with the stub axle - and there lies the problem. I have fitted the arm OK (bit of a struggle to align the pivot bolt), and expected the fitting of an after-market hub to be the least of my problems. However, on trying to torque down the bearing nut I find the stub axle rotates. Now I am in the situation where I cannot torque it down or unscrew it - the axle simply rotates. I assume something is supposed to prevent the axle from rotating. Haynes mentions when fitting a new stub axle ....."align its spines with those of the trailing arm". However, I think it reasonable to assume that the Citroen assembly would come with the stub axle ready secured. I can feel splines deep inside the hollow stub axle, and thought these may be to locate a tool to counter the nut torque, but evidently not. Anyone got any ideas. Helen
-
Oil stains on the rubber gaiter do not necessarily mean the cylinder ram is leaking and light leaks can be regarded as normal. For example, other forums have discussed that a Citroen-knowledgeable MOT examiner should not fail an MOT for oil stains on the gaiters. The gaiter is designed to contain fluid. It may just be the gaiter that is leaking (less than £10 on Ebay). Indeed, when replacing the gaiters you are required to pre-fill them with a specified amount of hydraulic fluid. It seems to me that if the ram seals are actually leaking , the fluid will leak into the gaiter and be returned to the reservoir via the integral return pipe. What I do before each MOT is to wipe the oil stains off the gaiters to avoid a failure. As mentioned above, if you have a serious leak the suspension will drop somewhat (eg during overnight parked). I also believe ram sealing kits are available should you be DIY minded.
-
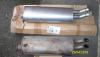
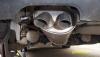
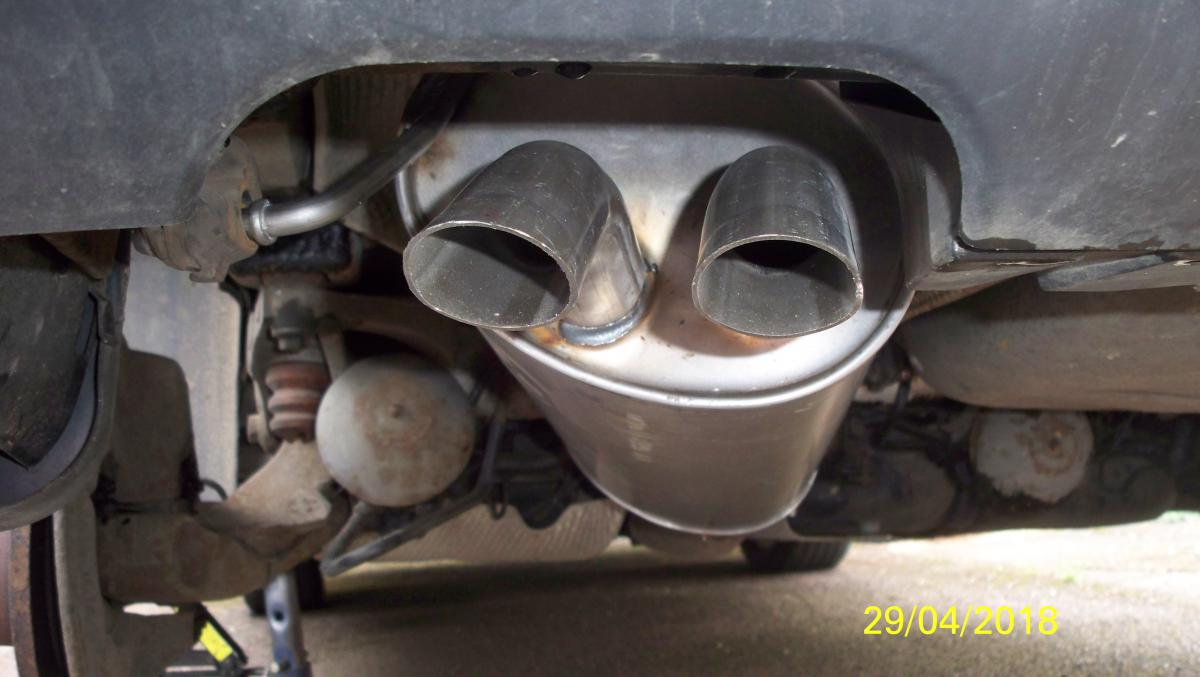
My original rear box finally gave up the ghost after 17 years and 170,000miles. In fact, it was not the box but the rear hanger which rusted away. So, I have researched replacements and give an account below. In summary, the Polish brand Polmo appears to have cornered the cheap exhaust market currently, but be cautious of the fit. Ignoring the ridiculously expensive Citroen part (I don't need an exhaust to last another 17 years!), the cheapest after market item appears to be the Polish brand Polmo (made by Polmostrow). Indeed, it would appear this brand is currently "the" cheap exhaust. It is the only brand supplied by ETS (European Trade Syndicate), who are Polish themselves (they are owned by 2 Poles). ETS appear to be solely a Polmo outlet although they don't identify the brand they sell!!. Other exhaust specialists also may not identify the brand, but if its around the £30-£50 mark it WILL be Polmo. Having double checked both the on-line catalogues of Polmo and ETS, I bought the correct item clearly specified by both sites. I bought it on ETS' Ebay shop for better consumer protection, complete with 2-piece clamp and 2 hanging rubbers for £40-ish. Later, I noticed the same exhaust is quoted on their own website for £15 less!! It arrived via Germany a few days later and it fitted..... "ish". First the plus side - the input pipe matched the diameter and flange of the car's exhaust. The 2 piece clamp is very much easier to fit than the single piece. On the down side, there was a 2cm gap between the mating flanges. Moreover, the hanging spigots on the ETS box are 12mm diam whereas the Citroen originals are 15mm. The hanging rubbers ETS supplied were identical to the Citroen originals ie to take 15mm spigots! So the 12mm spigots on the ETS exhaust were very loose in the 15mm rubbers that ETS provided with it!!. Or in other words, the rubbers needed to fit the ETS exhaust would have to have a 15mm hole and a 12mm hole - I doubt such items exist??However, this slack allowed me to take up that 2cm gap, and hence the box "fitted". It appears secure and has done 250 miles without issue. However, I contacted ETS to tell them my findings (for warranty purposes) who cross-checked the number stamped on the exhaust and said "its the wrong exhaust" and "we don't make one for your car"!! They asked for details of my car and then got stroppy over the difference between "saloon" and "hatchback". I described my body shape as "5 door saloon" (Citroen's official designation). First they said, "the item you ordered fits the estate". Then they said "you ordered for a hatchback, not a saloon, they are different". So I said they are the same, but they refused to accept this for a week of email exchanges. Even the fact that the rubber hangers they sent did not fit the exhaust they sent didn't seem to bother them. They tried to charge me for a return, but they finally accepted my demand for full refund and free return. Now, Citroen don't help. The rear box specified for all 2.2HDis of that vintage is 1726XC. Admittedly, the Polmo exhaust above is claimed to be equivalent to 1726X6, not 1726XC. Now, Citroen do list a 1726X6 but neither I nor my experienced Citroen dealer could identify from Citroen's online parts catalogues (Public or trade versions) which model the 1726X6 actually fits! Also, anyone ordering from Citroen a 1726XC WILL NOT receive the same as the original. You have to cut the pipe from the DPF to a specific length and use a sleeve (not a ring clamp) to joint the two together. Hence, the Polmo exhaust with the original flange fit is an advantage. Sorry if that all seems a bit complicated!!